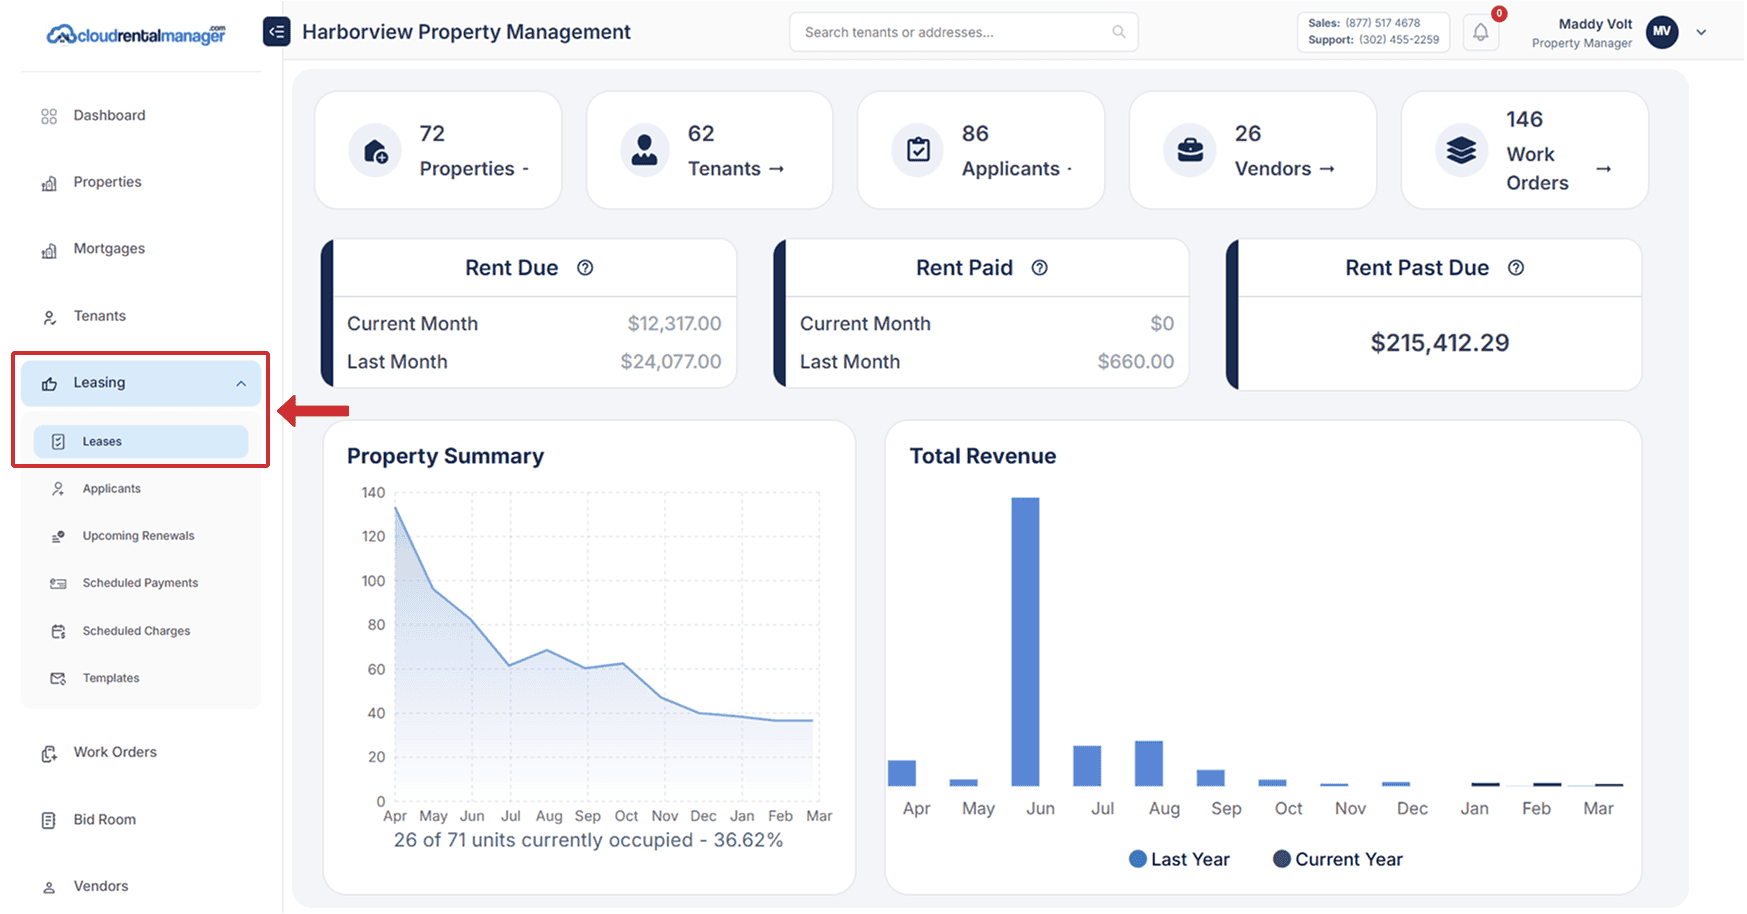
This step-by-step tutorial shows how to create a new lease in Cloud Rental Manager, selecting the property, adding a tenant, adding a cosigner , setting rent and deposits, adding charges, uploading lease files, applying an e-signature, and generating the lease.
From the Dashboard, use the left-hand menu to expand Leasing, then click Leases. On the Leases page, click the Add Lease button (top-right).
In the Property* dropdown, select the property/unit address for the lease.
In the Add Tenant* section, click Add Tenant / Cosigner to attach a tenant to the lease. If the tenant already exists:
If this is a new tenant, enter the required fields under Contact information:
Then click Add Tenant to save.
In the Rent section, complete:
If you’re collecting a deposit, enter the amount in Security Deposit (Optional).
To add recurring fees (e.g., monthly pet rent, parking, utilities):
In the Recurring Charge modal:
If the right account doesn’t exist, select Add new account.
If you selected Add new account, complete:
Fill the account details and click Add to save it.
Back in the Recurring Charge modal:
If a required field is missing, it will be highlighted. Select the Account* and ensure required fields are completed before saving.
Complete the one-time charge:
Upload documents under Upload Files (maximum of 10 files).
You can enable Residents Center Welcome Email if you want the system to send a welcome email to the tenant.
Click Generate Lease to create the lease record. After generating, return to the Leases list and confirm the lease is listed with: